Εισαγωγή
Introduction
Τον τελευταίο καιρό ασχολούμαι αρκετά και με τη 3D σχεδίαση κι εκτύπωση. Έχω στη διάθεσή μου έναν εκτυπωτή της Creality, τον Ender-5 Plus, ο οποίος είναι ένας τίμιος εκτυπωτής για την ηλικία του. Για την ώρα του έχω αλλάξει το build plate, ως πρώτη "αναβάθμιση" και του έχω εγκαταστήσει έναν Direct Drive Extruder, ενώ έχω αλλάξει και το σωληνάκι του νήματος σε capricorn tube. Ακόμα και πριν αυτές τις αναβαθμίσεις στο hardware οι εκτυπώσεις που έκανε ήταν καλές! Φυσικά έπρεπε να ασχοληθώ αρκετά με την τοποθέτηση των αντικειμένων στο build plate και το slicing ώστε να μην έχω προβλήματα στην εκτύπωση, αλλά ακόμα και δύσκολες εκτυπώσεις τις κατάφερνε κι ας μην ήταν πάντα με την πρώτη. Όλη αυτή η τριβή με έμαθε πολλά πράγματα επάνω στην τρισδιάστατη FDM εκτύπωση, αλλά το γεγονός πως αρκετό νήμα πήγαινε στα... σκουπίδια με ενοχλούσε. Κάνοντας τις αναβαθμίσεις του hardware πέτυχα να μειώσω δραστικά τα απορρίματα, αλλά ένα πράγμα που έχουν αυτοί οι παλιοί εκτυπωτες, είναι πως υπάρχει χώρος για περισσότερες αναβαθμίσεις και πειραματισμό. Αυτό με τη σειρά του σημαίνει πως τα πάντα πρέπει να τα προετοιμάζεις, γιατί αν είναι ο μόνος εκτυπωτής που διαθέτεις τότε μπορείς εύκολα να βρεθείς χωρίς αυτόν :).
Lately I've been quite involved with 3D design and printing as well. I have at my disposal a Creality printer, model Ender-5 Plus, which is a decent printer for its age. For now, I've changed the build plate as a first "upgrade" and installed a Direct Drive Extruder, while I've also swapped the filament tube to a Capricorn one. Even before these hardware upgrades, the prints it made were good! Of course, I had to spend quite a bit of time on placing objects on the build plate and slicing so that I wouldn't have printing issues, but it managed even difficult prints, even if not always on the first try. All this friction taught me many things about FDM 3D printing, but the fact that quite a bit of filament went to... waste bothered me. By making the hardware upgrades, I managed to drastically reduce waste, but one thing these old printers have is that there is room for more upgrades and experimentation. This in turn means that you have to prepare everything, because if it's the only printer you have, you can easily find yourself without it :).
Όμως ένας εκτυπωτής δεν είναι μόνο το hardware. Έχει μικροελεγκτή, που σημαίνει πως και το software του είναι ένας σημαντικός κρίκος (αν όχι αλυσίδα ολόκληρη) που εργάζεται στο θέμα της εκτύπωσης. Έτσι, παίζοντας πάντα, προσπάθησα να εγκαταστήσω όλα τα stock firmwares της Creality, αλλά πάντα υπήρχε κάποια αποτυχία λειτουργίας και κατέληγα στο firmware που είχε αρχικά. Τελικά, έπειτα από προτροπές ατόμων που ασχολούνται με το θέμα αυτό, μπήκα στη διαδικασία να εγκαταστήσω το τελευταίο Marlin (2.1.3b) που βρίσκεται εδώ και πολύ πολύ καιρό σε beta έκδοση. Έχει κι αυτό τα προβληματάκια του, αλλά... είπαμε, beta έκδοση, άρα αναμενόμενο. Από το σημείο που όλες αυτές οι αναβαθμίσεις (hardware και software) ολοκληρώθηκαν είχα αρξετά καλά αποτελέσματα με λιγότερο κόπο (από τον αρχικό), αλλά πάντα κάτι έλλειπε!
But a printer is not just hardware. It has a microcontroller, which means its software is also an important link (if not an entire chain) working on the printing matter. So, always playing, I tried to install all of Creality's stock firmwares, but there was always some functional failure and I ended up back at the firmware it originally had. Eventually, after encouragement from people involved with this topic, I got into the process of installing the latest Marlin (2.1.3b), which has been in beta for a very long time. It has its little issues too, but... we said it's beta, so expected. From the point where all these upgrades (hardware and software) were completed, I had quite good results with less effort (than the initial), but something was always missing!
Τελικά η ιδέα του να πειράξω αρκετά το hardware πέρασε από το μυαλό μου, μέχρι και το σημείο να τον μετατρέψω σε Core-XY, αλλά για την ώρα δεν το έχω κάνει. Όμως, αυτό που βλέπω πως δίνει καλύτερα αποτελέσματα από όλες τις απόψεις, δεν είναι το Marlin, αλλά ένα άλλο firmware για 3D εκτυπωτές, το Klipper. Έτσι, πήρα την απόφαση να προσπαθήσω να γυρίσω σε klipper το όλο σύστημα. Αυτό με τη σειρά του, είναι μια μεγάλη αναβάθμιση και απαιτεί πολλή δουλειά, προγραμματισμό των βημάτων που θα ακολουθήσω για να το πετύχω και πάντα να υπάρχει η δυνατότητα να το επαναφέρω στο Marlin ώστε αν χρειαστώ κάποια εκτύπωση να μπορώ να την κάνω. Αλλά για να μη μακρυγορούμε, ας μπούμε στο ψητό!
Finally, the idea of tinkering with the hardware a lot crossed my mind, up to the point of converting it to Core-XY, but for now I haven't done it. However, what I see giving better results from all perspectives is not Marlin, but another firmware for 3D printers, Klipper. So, I decided to try to convert the whole system to Klipper. This in turn is a big upgrade and requires a lot of work, planning of the steps I will follow to achieve it, and always having the possibility to revert to Marlin so that if I need a print I can do it. But to cut the long story short, let's get to the point!
Τι θα δούμε (και τι δε θα δούμε) σε αυτό το άρθρο
What is (and what's not) in this article
Σκοπός της ανάρτησης είναι να περιγράψω τον τρόπο με τον οποίο εγκατέστησα το klipper σε ένα ODroid-U2/U3. Η διαδικασία περιλαμβάνει αρχικά την εγκατάσταση του λειτουργικού σε αυτό και στη συνέχεια την εγκατάσταση του klipper. Εκεί είναι που τελειώνει η περιγραφή. Δεν είναι σκοπός μου ούτε να περιγράψω τη διαδικασία ρύθμισης, ούτε τον τρόπο που θα λειτουργήσει το ODroid σε έναν τρισδιάστατο εκτυπωτή.
The purpose of this post is to describe how I installed Klipper on an ODroid-U2/U3. The process involves first installing the operating system on it and then installing Klipper. That is where the description ends. It is not my intention to describe the configuration process, nor the way the ODroid will operate on a 3D printer.
Πιο αναλυτικά:
More specifically:
- Γιατί ODroid-U2/U3Why ODroid-U2/U3
- Εγκατάσταση λειτουργικού"Operating System Installation"
- Εγκατάσταση Debian BullseyeDebian Bullseye Installation
- Βασική Εγκατάσταση DebianBasic Debian Installation
- Η eMMC δεν εκκινείeMMC Does Not Boot
- Απενεργοποίηση του Αποθετηρίου BackportsDisabling Backports Repository
- Ενεργοποίηση του Σειριακού ΤερματικούEnabling the Serial Terminal
- Ενημέρωση του Debian BullseyeDebian Bullseye Updating
- Τελικές Ρυθμίσεις του ΛειτουργικούFinal Touches on the New Operating System
- Εγκατάσταση KlipperKlipper Installation
- Εγκατάσταση MoonrakerMoonraker Installation
- Εγκατάσταση FluiddFluidd Installation
- Εγκατάσταση KlipperScreenKlipperScreen Installation
- Εγκατάσταση CrowsnestCrowsnest Installation
- ΣυμπεράσματαConclusion
Γιατί ODroid-U2/U3
Why ODroid-U2/U3
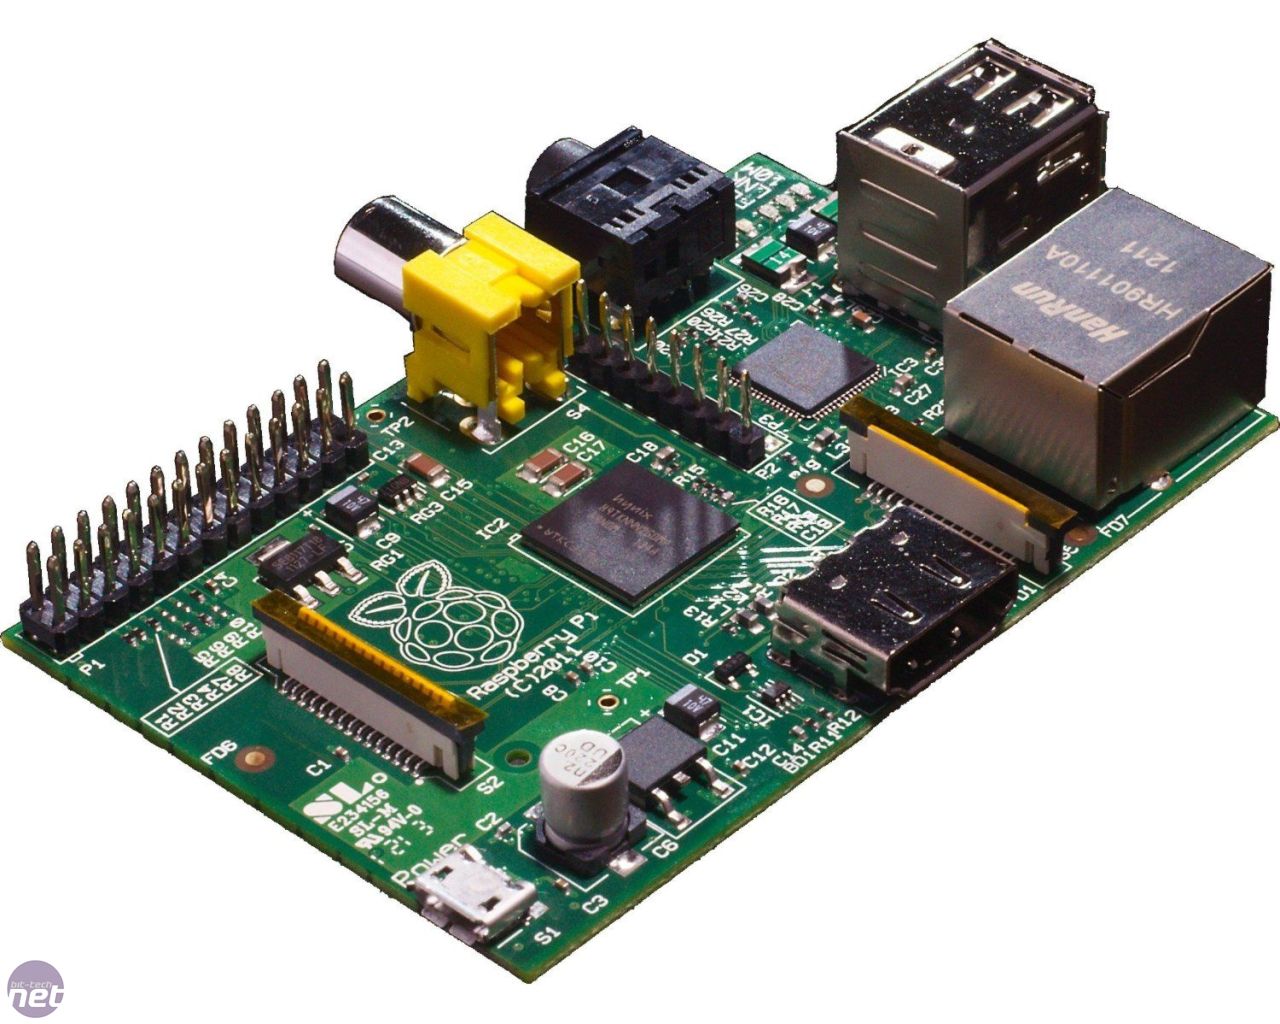
Γενικά θαυμάζω τους υπολογιστές μιας πλακέτας (SBCs - Single Board Computers). Η έντονη άνθισή τους στο χώρο ξεκίνησε από το Raspberry Pi. Στη συνέχεια ακολούθησαν κι άλλοι που δημιουργούσαν τέτοιους υποογιστές, μικρού μεγέθους, όπου με μια εγκατάσταση Linux μπορούσαν να αναλάβουν κάποιες διεργασίες χαμηλής ισχύος (δεν θα τις έλεγα καθημερινές, αλλά μπορείτε να καταλάβετε :)). Η αλήθεια είναι πως δεν υπήρξα ποτέ λάτρης του Raspberry Pi αλλά ψάχνωντας βρήκα την Hardkernel που κατασκευάζει τα ODroid, υπολογιστές μιας πλακέτας με πιο ισχυρό υλικό από αυτό του Raspberry Pi, σε αρκετά ανταγωνιστικές τιμές. Έτσι, έπεσε στα χέρια μου το Odroid U2 που μπορούσα να συνδέσω στο monitor και να παίζω παιχνίδια, ή να τρέξω το τότε XMBC και να το έχω για media server, κλπ. Τελικά κατέληξε να χειρίζεται ολόκληρο το δίκτυο φιλοξενούμενων ενός ξενοδοχείου, με απόλυτη επιτυχία.
Generally I admire single-board computers (SBCs). Their intense flourishing in the field started with the Raspberry Pi. Then followed others who created such small-sized sub-computers, where with a Linux installation they could handle some low-power processes (I wouldn't call them everyday tasks, but you get it :)). The truth is I was never a fan of the Raspberry Pi, but while searching I found Hardkernel, which manufactures the ODroid, single-board computers with more powerful hardware than the Raspberry Pi, at quite competitive prices. So, I got my hands on an Odroid U2 that I could connect to a monitor and play games, or run the then XBMC and use it as a media server, etc. It eventually ended up handling an entire hotel guest network with absolute success.
Όμως η εξέλιξη είναι έντονη και η υποστήριξη του ODroid U2 (κι ενός ODroid U3 που είχα στησει ως NAS) σταμάτησε και τα 32-bit θεωρούταν... λίγα! Τα ODroid μου κατέληξαν σε ένα συρτάρι και δεν έτρεξαν ηλεκτρόνια μέσα τους για μεγάλο χρονικό διάστημα. Με την ιδέα του Klipper στον εκτυπωτή, είπα πως θα ήταν μια καλή ευκαιριά να ξαναδούν... τα ηλεκτρόνια της ημέρας και να λειτουργήσουν στο μεγαλείο τους κάνοντας κάτι πολύ χρήσιμο. Αυτός ήταν και ο κύριος λόγος της επιλογής του ODroid U2/U3 για την αναβάθμιση του εκτυπωτή μου.
But evolution is intense and the support for the ODroid U2 (and an ODroid U3 that I had set up as a NAS) stopped, and 32-bit was considered... little! My ODroids ended up in a drawer and no electrons ran through them for a long time. With the idea of Klipper on the printer, I said it would be a good opportunity for them to see... the electrons of the day again and operate at their full glory doing something very useful. That was also the main reason for choosing the ODroid U2/U3 for upgrading my printer.
Γιατί το Odroid U3 είναι καλή επιλογή
Why the Odroid U3 is a good choice
- Ο επεξεργαστής Exynos 4412 (4 πυρήνες Cortex-A9) και τα 2GB RAM είναι υπεραρκετά για το Klipper, επιτρέποντας υψηλές ταχύτητες επεξεργασίας, ακόμα και κάμερες. The Exynos 4412 processor (4 Cortex-A9 cores) and 2GB RAM are more than enough for Klipper, allowing high processing speeds, even cameras.
- Μπορείς να εγκαταστήσεις ένα "καθαρό" Linux και να στήσεις τα πάντα μόνος σου, ή να χρησιμοποιήσεις έτοιμα εργαλεία. You can install a "clean" Linux and set everything up yourself, or use ready-made tools.
- Διαθέτει δύο (ODroid-U2) ή τρεις (ODroid-U3) θύρες USB και σύνδεση σε δίκτυο LAN It has two (ODroid-U2) or three (ODroid-U3) USB ports and a LAN network connection
- Χρησιμοποιεί μνήμη eMMC ή/και microSD ως μέσο αποθήκευσης. Η eMMC είναι μια πολύ πιο αξιόπιστη και γρήγορη μνήμη για χρήση σε λειτουργικό ενώ η microSD μπορεί να χρησιμοποιηθεί και για τη μεταφορά μοντέλων προς εκτύπωση χωρίς κανένα πρόβλημα. It uses eMMC memory and/or microSD as a storage medium. The eMMC is a much more reliable and fast memory for use as an operating system, while the microSD can also be used for transferring models for printing without any problem.
Το κύριο εμπόδιο είναι ότι το Odroid-U2/U3 είναι μια παλιά πλακέτα (armhf, 32-bit). Οι περισσότερες σύγχρονες, εύκολες λύσεις (OctoPi, MainsailOS, FluiddPi) δεν το υποστηρίζουν πλέον, καθώς βασίζονται σε 64-bit (arm64) λειτουργικά κι εδώ είναι που ξεκινάνε μερικά ευχάριστα απογεύματα, όπως λέει και ένας πολύ καλός μου φίλος!
The main obstacle is that the Odroid-U2/U3 is an old board (armhf, 32-bit). Most modern, easy solutions (OctoPi, MainsailOS, FluiddPi) no longer support it, as they are based on 64-bit (arm64) operating systems, and this is where some pleasant afternoons begin, as a very good friend of mine says!
Εγκατάσταση λειτουργικού
Operating System Installation
Το πρώτο βήμα είναι η εγκατασταση λειτουργικού. Σκοπός μας είναι να μπορέσουμε να τρέξουμε μια διανομή Linux κατάλληλη για το ODroid, αλλά όσο το δυνατόν πιο σύγχρονη. Τονίζω το "όσο το δυνατόν" γιατί η ανάπτυξη πυρήνα Linux 32 bit έχει σταματήσει εδώ κι αρκετό καιρό.
The first step is installing the operating system. Our goal is to be able to run a Linux distribution suitable for the ODroid, but as modern as possible. I emphasize "as possible" because 32-bit Linux kernel development has stopped for quite some time now.
Έπειτα από αναζήτηση στο διαδίκτυο βρήκα κάποιες πιθανές επιλογές:
After searching the internet, I found some possible options:
- ARCH Linux: Πρόκειται για μια σοβαρή διανομή με πολύ δυνατή κοινότητα. Το μόνο κακό είναι πως δεν έχω ασχοληθεί ποτέ με το ARCH κι έτσι είπα να μην το δοκιμάσω (αν και δεν αποκλείεται να το κάνω στο μέλλον). Με μια πρώτη ματιά φαίνεται να περιέχει όλα όσα χρειάζονται για την εγκατάσταση στο ODroid. Αν έχετε γνώση επάνω στη συγκεκριμένη διανομή ίσως είναι μια πολύ καλή επιλογή. ARCH Linux: This is a serious distribution with a very strong community. The only downside is that I have never dealt with ARCH, so I decided not to try it (although I don't rule out doing so in the future). At first glance, it seems to contain everything needed for installation on the ODroid. If you have knowledge of this particular distribution, it might be a very good choice.
- Odroid U2/U3 Ubuntu 18.04 Desktop image: Ένα image που έχει το μέγεθος των 128G! Φυσικά υπάρχει τρόπος να τη μετατρέψουμε σε 16G, αλλά σε γενικές γραμμές δεν είμαι και ο καλύτερος υποστηρικτής της διανομής Ubuntu... Επίσης είναι στημένη με τέτοιο τρόπο που λειτουργεί από τη microSD, αλλά κι αυτό διορθώνεται. Πάντως όχι η κατάσταση out of the box. Odroid U2/U3 Ubuntu 18.04 Desktop image: An image that is 128G in size! Of course, there is a way to convert it to 16G, but generally speaking, I am not the biggest supporter of the Ubuntu distribution... Also, it is set up in such a way that it works from the microSD, but that can also be fixed. Nevertheless, not an out-of-the-box situation.
- Debian Bullseye for Exynos4 boards: Το link οδηγεί σε forum από το οποίο είδα τη συγκεκριμένη προσπάθεια. Πρόκειται για διανομή Debian Bullseye με πυρήνα 5.19.10 αλλά έχει αναβάθμιση σε πυρήμα 6.3.1! Μια επίσης ολοκληρωμένη προσπάθεια εγκατάστασης με μικρό μέγεθος και τα καλούδια της αυτόματης αύξησης του τομέα του λειτουργικού ώστε να μποέσουμε να χρησιμοποιήσουμε όλο το μέγεθος της κάρτας eMMC ή microSD στην οποία την εγκαθιστούμε. Debian Bullseye for Exynos4 boards: The link leads to a forum where I saw this particular effort. It is a Debian Bullseye distribution with kernel 5.19.10, but it has an upgrade to kernel 6.3.1! A also complete installation effort with small size and the goodies of automatic root partition expansion so that we can use the entire size of the eMMC or microSD card on which we install it.
Φυσικά, όσοι με γνωρίζουν ξέρουν πως δύο είναι οι διανομές linux τις οποίες συμπαθώ πολύ και αυτές είναι η openSUSE και η Debian. Δεν είναι δύσκολο να μαντέψουμε με ποια από τις τρεις θα ασχοληθούμε σε αυτή την ανάρτηση :)
Of course, those who know me know that there are two Linux distributions that I like very much, and these are openSUSE and Debian. It is not hard to guess which of the three we will deal with in this post :)
Εγκατάσταση Debian Bullseye
Debian Bullseye Installation
Ακολουθώντας τις οδηγείες στο Forum, κατεβάζουμε το συμπιεσμένο image στον υπολογιστή μας και το αποσυμπιέζουμε. Αυτό θα μας δώσει ένα αρχείο
Following the instructions in the Forum, we download the compressed image to our computer and decompress it. This will give us a file
Debian-Bullseye-1.0-20221017-Exynos4.img
μεγέθους 1.3G. Αυτό το αρχείο είναι που θα περάσουμε στην κάρτα eMMC. Για να το κάνουμε αυτό χρησιμοποιούμε τον αντάπτορα της eMMC σε microSD της Hardkernel. Τοποθετούμε την eMMC σε ένα microSD reader και είμαστε έτοιμοι για την εγκατάσταση.
of size 1.3G. This file is what we will write to the eMMC card. To do this, we use Hardkernel's eMMC to microSD adapter. We place the eMMC in a microSD reader and we are ready for the installation.
Το πρώτο πράγμα που κάνουμε είναι να δούμε ποια συσκευή συνδέθηκε ώστε να μπορέσουμε να γράψουμε το image στη σωστή. Αυτό είναι ένα επικίνδυνο βήμα γιατί μπορεί να φλασάουμε λάθος συσκευή και τα αποτελέσματα να είναι... χάσιμο χρήσιμων δεδομένων!!!
The first thing we do is to see which device was connected so we can write the image to the correct one. This is a dangerous step because we might flash the wrong device and the results would be... loss of useful data!!!
eliaschr@andromeda:~> dmesg
.
.
.
[11749.335131] [  T26227] scsi 0:0:0:0: Direct-Access     Generic  Mass-Storage     2.00 PQ: 0 ANSI: 2
[11749.335655] [  T26227] sd 0:0:0:0: Attached scsi generic sg0 type 0
[11749.336535] [  T30657] sd 0:0:0:0: [sda] 30777344 512-byte logical blocks: (15.8 GB/14.7 GiB)
[11749.336902] [  T30657] sd 0:0:0:0: [sda] Write Protect is off
[11749.336910] [  T30657] sd 0:0:0:0: [sda] Mode Sense: 03 00 00 00
[11749.337279] [  T30657] sd 0:0:0:0: [sda] No Caching mode page found
[11749.337284] [  T30657] sd 0:0:0:0: [sda] Assuming drive cache: write through
[11749.370196] [  T30657]  sda: sda1 sda2
[11749.370419] [  T30657] sd 0:0:0:0: [sda] Attached SCSI removable disk
Εδώ φαίνεται από την έξοδο της εντολής πως η καινούργια συσκευή αναγνωρίζεται από το λειτουργικό μας ως /dev/sda αλλά στη δικιά σας περίπτωση ίσως το αναγνωριστικό να είναι διαφορετικό. Μπορούμε να προχωρήσουμε στην εγγραφή του image σε αυτή (προσοχή στο να βάλετε το σωστό αναγνωριστικό στη θέση /dev/sda):
Here it is shown from the command output that the new device is recognized by our operating system as /dev/sda, but in your case the identifier may be different. We can proceed to write the image to it (be careful to put the correct identifier in place of /dev/sda):
eliaschr@andromeda:~> sudo dd if=Debian-Bullseye-1.0-20221017-Exynos4.img of=/dev/sda bs=4M status=progress conv=notrunc,fsync
855638016 bytes (856 MB, 816 MiB) copied, 2 s, 427 MB/s1346371584 bytes (1,3 GB, 1,3 GiB) copied, 2,93373 s, 459 MB/s

321+0 records in
321+0 records out
1346371584 bytes (1,3 GB, 1,3 GiB) copied, 80,3897 s, 16,7 MB/s
Όταν η εντολή ολοκληρωθεί θα έχουμε το Debian έτοιμο να τρέξει στο ODroid μας. Βγάζουμε την κάρτα από το microSD reader και τη συνδέουμε στο ODroid. Θα πρέπει να γνωρίζουμε πως στην πρώτη εκκίνηση εκτελούνται κάποια scripts που προετοιμάζουν τη διανομή για τη λειτουργία της στο αποθηκευτικό μέσο που την εγκαταστήσαμε, όπως το να επεκτείνει το partition ώστε να καταλάβει όλο το διαθέσιμο χώρο. Μετά από αυτές τις μικροεπεμβάσεις ενδέχεται να κάνει επανεκκίνηση το σύστημα μόνο του.
When the command completes, we will have Debian ready to run on our ODroid. We remove the card from the microSD reader and connect it to the ODroid. We should know that on first boot some scripts run that prepare the distribution for operation on the storage medium where we installed it, such as expanding the partition to occupy all available space. After these small interventions, the system may reboot on its own.
Η eMMC δεν εκκινεί
eMMC Does Not Boot
Υπάρχει μια πιθανότητα να μην εκκινήσει η εγκατάστασή μας από την eMMC. Σε αυτή την περίπτωση, συνδέουμε και πάλι την eMMC στο μετατροπέα της microSD κι εκκινούμε από τη microSD στο ODroid. Αν και πάλι δεν εκκινήσει τότε κάτι δεν πήγε καλά στην εγγραφή. Αν όμως εκκινήσει, τότε χρειάζεται να γράψουμε ένα καινούργιο u-boot στην eMMC ώστε να μπορέσει να τη διαχειριστεί το ODroid ως bootable. Αν όμως λειτούργησε κανονικα η eMMC στη σωστή υποδοχή της τότε προσπεράστε αυτό το βήμα!
There is a possibility that our installation will not boot from the eMMC. In that case, we connect the eMMC back to the microSD adapter and boot from the microSD slot on the ODroid. If it still does not boot, then something went wrong during writing. But if it boots, then we need to write a new u-boot to the eMMC so that the ODroid can manage it as bootable. If the eMMC worked normally in its proper socket, then skip this step!
Το u-boot είναι ένα σύστημα που βοηθάει στην εκκίνηση των υπολογιστών αυτής της κατηγορίας. Βρίσκεται στους πρώτους sectors του μέσου αποθήκευσης, αλλά στην περίπτωση των eMMC, αυτοί είναι προστατευμένοι από εγγραφή, έτσι ώστε να μη μπορεί να αλλάξει από λάθος. Αν διαγραφεί το u-boot τότε ο υπολογιστής μας δε μπορεί να εκκινήσει.
The u-boot is a system that helps boot computers of this category. It resides in the first sectors of the storage medium, but in the case of eMMC, these are write-protected, so that it cannot be changed by mistake. If the u-boot is erased, then our computer cannot boot.
Για να μπορέσουμε να αλλάξουμε το u-boot κανονικά θα πρέπει να απενεργοποιήσουμε την προστασία εγγραφής της eMMC, να γράψουμε τους κατάλληλους sectors έτσι ώστε να μην πειράξουμε το partition table και στη συνέχεια να επαναφέρουμε την προστασία. Ευτυχώς, μιας και η διαδικασία είναι λίγο tricky το ανοικτό λογισμικό δείχνει για άλλη μια φορά τη δύναμή του. Υπάρχει έτοιμο script που γράφει το u-boot στην eMMC χωρίς να χρειαστεί τίποτα άλλο από το να το εκτελέσουμε. Θα το βρούμε στο github του Ben Howell, απ' όπου μπορούμε και να το κατεβάσουμε.
To change the u-boot properly, we need to disable the write protection of the eMMC, write the appropriate sectors so as not to touch the partition table, and then re-enable the protection. Fortunately, since the process is a bit tricky, open source shows its power once again. There is a ready-made script that writes the u-boot to the eMMC without needing anything else but to execute it. We will find it on Ben Howell's github, from where we can also download it.
Έχωντας εκκινήσει από τη microSD θύρα, απλά κάνουμε login ως root με κωδικό odroid.Aυτό μπορεί να γίνει με διάφορους τρόπους:
Having booted from the microSD port, we simply log in as root with password odroid. This can be done in various ways:
- Ο πιο απλός είναι να έχουμε συνδέσει οθόνη και πληκτρολόγιο στο ODroid. The simplest is to have a monitor and keyboard connected to the ODroid.
- Αν θέλουμε μπορούμε να μπούμε με ssh, αρκεί να γνωρίζουμε τη διεύθυνση ip του ODroid. If we want, we can log in via ssh, as long as we know the ODroid's IP address.
- Ο τρίτος τρόπος είναι να κάνουμε χρήση του USB-to-serial της Hardkernel και να χρησιμοποιήσουμε ένα πρόγραμμα τερματικού, όπως το CuteCom για να κάνουμε login από τον υπολογιστή μας, απευθείας. The third way is to use Hardkernel's USB-to-serial and use a terminal program, like CuteCom, to log in directly from our computer.
Αν προσπαθήσετε να χρησιμοποιήσετε τον τρίτο τρόπο αλλά βλέπετε στο τερματικό στο τέλος ένα μήνυμα
If you try to use the third method but at the end of the terminal you see a message
[ 0.000000] printk: bootconsole [exynos4210] disabled
τότε η λύση φαίνεται στην παρακάτω παράγραφο, Ενεργοποίηση του σειριακού τερματικού. Μπορείτε αν θέλετε να κάνετε τη διόρθωση πρώτα και μετά να επιστρέψετε σε αυτό το σημείο και να ολοκληρώσετε την ενεργοποίηση της eMMC με καινούργιο u-boot.
then the solution is shown in the following paragraph, Enabling the serial terminal. You can, if you want, make the correction first and then return to this point and complete the enabling of the eMMC with a new u-boot.
Σε αυτό το σημείο θα χρησιμοποιήσω τη δεύτερη περίπτωση, μιας και οι άλλες δύο είναι ίδιες με την περίπτωση που κάνουμε login και στον υπολογιστή μας. Για να βρούμε τη διεύθυνση IP αρκεί να κοιτάξουμε τη σελίδα του router μας στις εκχωρημένες διευθύνσεις και θα τη δούμε. Στη δικιά μου περίπτωση είναι η 192.168.1.238. Έτσι, δίνω την εντολή ssh:
At this point I will use the second option, since the other two are the same as logging in on our computer. To find the IP address, it is enough to look at our router's page in the assigned addresses and we will see it. In my case it is 192.168.1.238. So, I issue the ssh command:
eliaschr@andromeda:~> ssh root@192.168.1.238
The authenticity of host '192.168.1.238 (192.168.1.238)' can't be established.
ED25519 key fingerprint is: ...
This key is not known by any other names.
Are you sure you want to continue connecting (yes/no/[fingerprint])? yes
Warning: Permanently added '192.168.1.238' (ED25519) to the list of known hosts.
root@192.168.1.238's password:
Linux odroid-bullseye 5.19.10-armmp-lpae #exynos SMP PREEMPT Sun Sep 25 14:52:18 UTC 2022 armv7l

The programs included with the Debian GNU/Linux system are free software;
the exact distribution terms for each program are described in the
individual files in /usr/share/doc/*/copyright.

Debian GNU/Linux comes with ABSOLUTELY NO WARRANTY, to the extent
permitted by applicable law.
root@odroid-bullseye:~# apt update
Get:1 http://deb.debian.org/debian bullseye InRelease [75.1 kB]
Get:2 http://security.debian.org bullseye-security InRelease [27.2 kB]
Get:3 http://deb.debian.org/debian bullseye-updates InRelease [44.0 kB]
.
.
.
root@odroid-bullseye:~#
Το πρώτο πράγμα που κάνουμε είναι να εγκαταστήσουμε το git για να μπορέσουμε να κλωνοποιήσουμε το αποθετήριο του προγράμματος εγκατάστασης του u-boot. Αυτό έχει ως προαπαιτούμενο να ενημερωθούν τα περιεχόμενα των αποθετηρίων του apt (εντολή apt update). Κάτι που θα παρατηρήσουμε είναι πως κατά τη διάρκεια του update υπάρχει σφάλμα όταν πάει το σύστημα να διαβάσει το αποθετήριο backports. Αυτό το αποθετήριο έχει καταργηθεί κι έτσι πρέπει να το απομακρύνουμε από τη λίστα των αποθετηρίων. Αυτό γίνεται πολύ εύκολα με το να απενεργοποιήσουμε την αντίστοιχη γραμμή από τη λίστα των αποθετηρίων στο αρχείο /etc/apt/sources.list προσθέτωντας απλά ένα '# στην αρχή της. Το τελικό περιεχόμενο του αρχείου φαίνεται ακολούθως:
The first thing we do is install git so that we can clone the repository of the u-boot installation program. This requires updating the contents of the apt repositories (command apt update). Something we will notice is that during the update there is an error when the system tries to read the backports repository. This repository has been discontinued, so we need to remove it from the list of repositories. This is done very easily by disabling the corresponding line from the list of repositories in the file /etc/apt/sources.list by simply adding a '#' at the beginning of it. The final content of the file is shown below:
deb http://deb.debian.org/debian bullseye main contrib non-free
deb http://security.debian.org/ bullseye-security main contrib non-free
deb http://deb.debian.org/debian bullseye-updates main contrib non-free
# deb http://deb.debian.org/debian bullseye-backports main contrib non-free
Με αυτό τον τρόπο θα σταματήσει να υπάρχει σφάλμα κατά την ενημέρωση των αποθετηρίων. Τώρα μπορούμε να εγκαταστήσουμε το git.
In this way, the error during the repository update will stop occurring. Now we can install git.
root@odroid-bullseye:~# apt-get install git
Reading package lists... Done
Building dependency tree... Done
.
.
.
Do you want to continue? [Y/n] Y
.
.
.
root@odroid-bullseye:~#
Σειρά έχει η κλωνοποίηση...
Now its time to clone the u-boot repository...
root@odroid-bullseye:~# git clone https://github.com/benhowell/odroid-U3-emmc-u-boot-debian-bullseye.git
Cloning into 'odroid-U3-emmc-u-boot-debian-bullseye'...
.
.
.
root@odroid-bullseye:~#
Για να γίνει η εγκατάσταση του u-boot αρκεί να μπούμε μέσα στον καινούργιο κατάλογο και να τρέξουμε το script. Ακολουθούμε τα βήματα:
In order to install u-boot, we must enter the newlly created directory and run its fusng script. Follow the steps:
root@odroid-bullseye:~# cd odroid-U3-emmc-u-boot-debian-bullseye/
root@odroid-bullseye:~/odroid-U3-emmc-u-boot-debian-bullseye# chmod +x sd_fusing.sh
root@odroid-bullseye:~/odroid-U3-emmc-u-boot-debian-bullseye# ll /dev/disk/by-id/
total 0
lrwxrwxrwx 1 root root 13 Aug 27 15:38 mmc-016G92_0xc84d948e -> ../../mmcblk0
lrwxrwxrwx 1 root root 15 Aug 27 15:38 mmc-016G92_0xc84d948e-part1 -> ../../mmcblk0p1
lrwxrwxrwx 1 root root 15 Aug 27 15:38 mmc-016G92_0xc84d948e-part2 -> ../../mmcblk0p2
root@odroid-bullseye:~/odroid-U3-emmc-u-boot-debian-bullseye#
Αφού μπούμε στον κατάλογο, μαρκάρουμε το sd_fusing.sh ως εκτελέσιμο, βλέπουμε την ονομασία της συσκευής αποθήκευσης (/dev/mmcblk0) και στη συνέχεια εκτελούμε το script ώστε να εγγραφεί σε αυτή τη συσκευή το καινούργιο u-boot. Η τελευταία εντολή παίρνει λίγη ώρα για να ολοκληρωθεί!
After we enter the directory, we mark sd_fusing.sh as executable, we see the name of the storage device (/dev/mmcblk0) and then we execute the script so that the new u-boot is written to this device. The last command takes a little while to complete!
root@odroid-bullseye:~/odroid-U3-emmc-u-boot-debian-bullseye# ./sd_fusing.sh /dev/mmcblk0
++ '[' -z /dev/mmcblk0 ']'
++ '[' -b /dev/mmcblk0 ']'
++ echo '/dev/mmcblk0 reader is identified.'
/dev/mmcblk0 reader is identified.
.
.
.
U-boot image is fused successfully.
++ echo 'Eject SD card and insert it again.'
Eject SD card and insert it again.
root@odroid-bullseye:~/odroid-U3-emmc-u-boot-debian-bullseye#
Απενεργοποιούμε το ODroid και στη συνέχεια βάζουμε τηνβ eMMC στην υποδοχή της. Το σύστημα πρέπει να εκκινήσει κανονικά όταν το ενεργοποιήσουμε ξανά.
We turn off the ODroid and then place the eMMC in its slot. The system should boot normally when we turn it on again.
Ενεργοποίηση του Σειριακού Τερματικού
Enabling the Serial Terminal
Αρχικά ας δούμε λίγα πράγματα για την εκκίνηση του ODroid (ισχύει και για άλλους υπολογιστές μιας πλακέτας SBCs). Το πρώτο partition μέσα στην eMMC είναι ο τομέας boot. Εκεί βρίσκονται κάποια ενδιαφέροντα αρχεία. Μπορούμε να τα δούμε όταν έχουμε κάνει login ως root μέσα στον κατάλογο /boot.
First, let's look at a few things about the ODroid boot process (this also applies to other single-board computers, SBCs). The first partition inside the eMMC is the boot partition. There are some interesting files located there. We can see them when we have logged in as root inside the /boot directory.
root@odroid-bullseye:~# cd /boot/
root@odroid-bullseye:/boot# ll
total 22828
-rw-r--r-- 1 root root  5186917 Sep 25  2022 System.map-5.19.10-armmp-lpae
-rw-r--r-- 1 root root     4221 Oct  3  2022 boot.scr
-rw-r--r-- 1 root root   183610 Sep 25  2022 config-5.19.10-armmp-lpae
-rw-r--r-- 1 root root     4844 Jul 10  2022 config.ini
lrwxrwxrwx 1 root root       49 Oct  3  2022 dtb -> dtbs/5.19.10-armmp-lpae/./exynos4412-odroidu3.dtb
lrwxrwxrwx 1 root root       49 Oct  3  2022 dtb-5.19.10-armmp-lpae -> dtbs/5.19.10-armmp-lpae/./exynos4412-odroidu3.dtb
drwxr-xr-x 3 root root     4096 Oct  3  2022 dtbs
-rw-r--r-- 1 root root  7529363 Oct  3  2022 initrd.img-5.19.10-armmp-lpae
drwx------ 2 root root    16384 Jun 17  2022 lost+found
-rwxr-xr-x 1 root root 10431864 Sep 25  2022 vmlinuz-5.19.10-armmp-lpae
root@odroid-bullseye:/boot#
Αν γνωρίζουμε λίγα πράγραματα από τον τρόπο με τον οποίο φορτώνεται το Linux στον υπολογιστή μας, θα αναγνωρίσουμε κάποια αρχεία, όπως το αρχικό ram disk image και το αρχείο του βασικού πυρήνα. Όμως αυτά τα αρχεία τα οποία έχουν ιδιαίτερη σημασία είναι το boot.scr και το config.ini. Ενώ και τα δύο αρχεία μπορούμε να τα δούμε ως απλά αρχεία κειμένου, αυτό στην πραγματικότητα ισχύει μόνο για το config.ini. Το boot.scr είναι ένα αρχείο κειμένου, αλλά τα πρώτα bytes του περιέχουν κάποιες πληροφορίες σχετικές με το αρχείο. Αν κάνουμε κάποια αλλαγή σε αυτό, τότε το u-boot θα το καταλάβει και θα παραπονεθεί πως το αρχείο δεν είναι σωστό, αρνούμενο να προχωρήσει στην εκκίνηση του συστήματος. Για να μπορέσουμε, λοιπόν, να το παραλλάξουμε δεν φτάνει μόνο ένα πρόγραμμα τύπου vi ή nano.
If we know a little about the way Linux loads on our computer, we will recognize some files, such as the initial ram disk image and the main kernel file. However, the files that are particularly important are boot.scr and config.ini. While both files can be viewed as plain text files, this actually applies only to config.ini. boot.scr is a text file, but its first bytes contain some information related to the file. If we make any change to it, then the u-boot will notice it and complain that the file is not correct, refusing to proceed with the system boot. Therefore, to be able to modify it, just a program like vi or nano is not enough.
Το πρώτο πράγμα που κάνουμε είναι να δημιουργήσουμε ένα αντίγραφο ασφαλείας του boot.scr και ένα δεύτερο που μετά να το μετατρέψουμε σε απλό κείμενο ώστε να το επεξεργαστούμε:
The first thing we do is create a backup copy of boot.scr and a second one that we then convert to plain text so that we can edit it:
root@odroid-bullseye:/boot# cp boot.scr boot.scr.bkp
root@odroid-bullseye:/boot# cp boot.scr boot.txt
Στη συνέχεια θα επεξεργαστούμε το boot.txt. Μπορείτε να το κάνετε με το αγαπημένο σας πρόγραμμα. Εγώ είμαι fun του vi, αλλά θα περιγράψω μόνο τις αλλαγές που πρέπει να κάνετε και όχι το πώς. Ανοίγετε το boot.txt και διαγράφετε την πρώτη-πρώτη γραμμή. Αυτή είναι η κεφαλίδα. Με αυτό τον τρόπο θα παραμείνουν μόνο οι εντολές του boot.scr. Στη συνέχεια εντοπίζουμε τις ακόλουθες γραμμές μέσα στο αρχείο:
Then we will edit boot.txt. You can do it with your favorite program. I am a fan of vi, but I will describe only the changes you need to make and not how. Open boot.txt and delete the very first line. This is the header. This way only the boot.scr commands will remain. Then we locate the following lines inside the file:
.
.
.
 70 # different console for AmLogic devices
 71 if test "${soc}" = "meson"; then
 72   setenv console "ttyAML0,115200n8"
 73   setenv usbcore "usbcore.autosuspend=-1"
 74 elif test "${soc}" = "exynos"; then
 75   setenv console "ttySAC2,115200n8"
 76   # set correct dtb file
 77   if test "${board_name}" = "smdk5420xu4"; then
 78     setenv fdtfile "exynos5422-odroidxu4.dtb"
.
.
.
Το σφάλμα βρίσκεται στη γραμμή 75 (στο αρχείο που έχω εγώ, στο δικό σας μπορεί να βρίσκεται σε άλλη γραμμή). Η κονσόλα που πρέπει να χρησιμοποιηθεί είναι η ttySAC1 και όχι η ttySAC2. Μπορείτε να αλλάξετε άφοβα το 2 σε 1 και αποθηκεύετε το αρχείο.
The error is on line 75 (in my file, in yours it may be on a different line). The console that must be used is ttySAC1 and not ttySAC2. You can safely change the 2 to 1 and save the file.
Τέλος μετατρέπουμε το αρχείο boot.txt σε κανονικό αρχείο τύπου scr:
Finally, we convert the boot.txt file into a proper scr file:
root@odroid-bullseye:/boot# mkimage -C none -A arm -T script -d boot.txt boot.scr
Image Name:
Created:      Thu Aug 27 19:17:36 2026
Image Type:   ARM Linux Script (uncompressed)
Data Size:    4192 Bytes = 4.09 KiB = 0.00 MiB
Load Address: 00000000
Entry Point:  00000000
Contents:
   Image 0: 4184 Bytes = 4.09 KiB = 0.00 MiB
root@odroid-bullseye:/boot#
Αν το σύστημα δεν βρίσκει την εντολή mkimage, τότε θα πρέπει να εγκαταστήσετε το πακέτο u-boot-tools.
If the system does not find the mkimage command then you should install u-boot-toold package.
root@odroid-bullseye:/boot# apt update && apt install u-boot-tools
Έπειτα από την εκτέλεση της mkimage θα έχουμε ένα έγκυρο boot.scr στον κατάλογο. Την επόμενη φορά που θα εκκινήσουμε το ODroid θα έχουμε πρόσβαση στο σειριακό τερματικό και θα είμαστε σε θέση να χειριστούμε το σύστημά μας από εκεί!
After executing mkimage we will have a valid boot.scr in the directory. The next time we boot the ODroid we will have access to the serial terminal and we will be able to control our system from there!
Ενημέρωση του Debian Bullseye
Debian Bullseye Updating
Σε αυτό το σημείο το ODroid πρέπει να εκκινεί κανονικά και να έχουμε πρόσβαση σε αυτό, είτε με φυσική σύνδεση (τερματικό ή πληκτρολόγιο/οθόνη) είτε μέσω δικτύου. Το επόμενο βήμα είναι να κάνουμε ενημέρωση του συστήματος. Θα υπενθυμίσω πως καλό είναι να απενεργοποιηθεί η repository του backports, όπως περιγράφεται στην παράγραφο Η eMMC δεν εκκινεί
At this point the ODroid should boot normally and we should have access to it, either with physical connection (terminal or keyboard/monitor) or via network. The next step is to update the system. I will remind you that it is good to disable the backports repository, as described in the paragraph The eMMC does not boot
root@odroid-bullseye:~# apt update
.
.
.
root@odroid-bullseye:~# apt upgrade
.
.
.
Need to get 107 MB of archives.
After this operation, 130 MB of additional disk space will be used.
Do you want to continue? [Y/n]
Σε αυτό το σημείο απαντάμε με Y και η ενημέρωση του συστήματος ξεκινάει. Όταν τελειώσει προχωράμε και στο τελευταίο βήμα ενημέρωσης και στη συνέχεια επανεκκίνηση:
Of course, our answer to this prompt is Y and the system updating starts. When its over we proceed to the last updating step and then reboot:
root@odroid-bullseye:~# apt dist-upgrade
.
.
.
root@odroid-bullseye:~# shutdown -r now
Παρότι κάναμε την επανεκκίνηση θα παρατηρήσουμε πως το σύστημα ακόμα τρέχει τον παλιό πυρήνα (5.19.10).
Though we restarted the system we can fnid out that is still runs the old kernel (5.19.10).
root@odroid-bullseye:~# uname -a
Linux odroid-bullseye 5.19.10-armmp-lpae #exynos SMP PREEMPT Sun Sep 25 14:52:18 UTC 2022 armv7l GNU/Linux
root@odroid-bullseye:~#
Μπορούμε να δούμε, όμως, πως υπάρχει ήδη καινούργιος πυρήνας 6.3.1 ο οποίος δεν ενεργοποιήθηκε αυτόματα. Για να τον χρησιμοποιήσουμε θα πρέπει να πούμε στο u-boot πως θα πρέπει να τον φορτώσει, αντί για τον παλιό. Εδώ έρχεται και η χρήση του config.ini που είχαμε βρει μέσα στον κατάλογο /boot. Εκεί θα βρούμε και διάφορα άλλα καλούδια από την άποψη της ρύθμισης της εκκίνησης του συστήματος, όπως και το ποιο video mode θα χρησιμοποιήσουμε. Σε γενικές γραμμές το αρχείο config.ini είναι ένα αρχείο που φορτώνεται πρώτο και απλά δημιουργεί κάποιες μεταβλητές συστήματος. Στη συνέχεια το boot.scr μπορεί και βλέπει αν αυτές οι μεταβλητές είναι ήδη δηλωμένες από τον χρήστη ή θα πρέπει να τις υπολογίσει μόνο του. Έτσι, αν εμείς πειράξουμε κάποια μεταβλητή το u-boot θα σεβαστεί την επιθυμία μας :). Είναι ένα απλό αρχείο κειμένου και δεν χρειάζεται κάποιο ιδιαίτερο τρόπο επεξεργασίας, όπως είναι η περίπτωση του boot.scr. Ένα απλό vi ή nano είναι αρκετό. Ας δούμε πρώτα τα νέα περιεχόμενα του /boot.
We can see, however, that there is already a new kernel 6.3.1 which was not activated automatically. To use it we need to tell u-boot that it should load it, instead of the old one. This is where the use of config.ini that we found inside the /boot directory comes in. There we will also find various other goodies regarding the boot configuration, such as which video mode to use. In general, the config.ini file is a file that loads first and simply creates some system variables. Then boot.scr can see if these variables are already declared by the user or if it has to calculate them itself. So, if we modify some variable, u-boot will respect our wish :). It is a simple text file and does not need any special editing method, unlike boot.scr. A simple vi or nano is enough. Let's first see the new contents of /boot.
root@odroid-bullseye:~# cd /boot/; ll
total 45744
-rw-r--r-- 1 root root  5186917 Sep 25  2022 System.map-5.19.10-armmp-lpae
-rw-r--r-- 1 root root  4336992 May  8  2023 System.map-6.3.1-armmp-lpae
-rw-r--r-- 1 root root     4221 Oct  3  2022 boot.scr
-rw-r--r-- 1 root root     4221 Aug 27 18:38 boot.scr.bkp
-rw-r--r-- 1 root root     4184 Aug 27 19:13 boot.txt
-rw-r--r-- 1 root root   183610 Sep 25  2022 config-5.19.10-armmp-lpae
-rw-r--r-- 1 root root   193979 May  8  2023 config-6.3.1-armmp-lpae
-rw-r--r-- 1 root root     4844 Jul 10  2022 config.ini
lrwxrwxrwx 1 root root       47 Aug 28 08:21 dtb -> dtbs/6.3.1-armmp-lpae/./exynos4412-odroidu3.dtb
lrwxrwxrwx 1 root root       49 Oct  3  2022 dtb-5.19.10-armmp-lpae -> dtbs/5.19.10-armmp-lpae/./exynos4412-odroidu3.dtb
lrwxrwxrwx 1 root root       47 Aug 28 08:21 dtb-6.3.1-armmp-lpae -> dtbs/6.3.1-armmp-lpae/./exynos4412-odroidu3.dtb
drwxr-xr-x 4 root root     4096 Aug 28 08:18 dtbs
-rw-r--r-- 1 root root  7529363 Oct  3  2022 initrd.img-5.19.10-armmp-lpae
-rw-r--r-- 1 root root  7819598 Aug 28 08:20 initrd.img-6.3.1-armmp-lpae
drwx------ 2 root root    16384 Jun 17  2022 lost+found
-rwxr-xr-x 1 root root 10431864 Sep 25  2022 vmlinuz-5.19.10-armmp-lpae
-rwxr-xr-x 1 root root 11088928 May  8  2023 vmlinuz-6.3.1-armmp-lpae
root@odroid-bullseye:/boot#
Σε πρώτη φάση ας παρατηρήσουμε πως ό,τι έχει να κάνει με τον πυρήνα 5.19.10 έχει ως αναγνωριστικό το 5.19.10-armmp-lpae, ενώ ό,τι αφορά τον πυρήνα 6.3.1 έχει αναγνωριστικό το 6.3.1-armmp-lpae. Αυτό το χρειαζόμαστε για το config.ini. Ας δούμε κάποιες αλλαγές που μπορούμε να κάνουμε μέσα στο αρχείο αυτό:
First, let's observe that everything related to kernel 5.19.10 has the identifier 5.19.10-armmp-lpae, while everything related to kernel 6.3.1 has the identifier 6.3.1-armmp-lpae. We need this for config.ini. Let's look at some changes we can make inside this file:
- Με μια αναζήτηση στο boot.scr μπορούμε να δούμε τις γραμμές:
Searching through the boot.scr file we can find the lines:
Αυτό μας δείχνει πως αν εμείς αλλάξουμε το νούμερο του πυρήνα, τότε το σύστημα θα εκκινεί τον καινούργιο. Για να το κάνουμε αυτό απλά προσθέτουμε στο τέλος του config.ini τη γραμμή: This shows us that if we change the kernel number, then the system will boot the new one. To do this, we simply add to the end of config.ini the line:
. . . if test -z "${fk_kvers}"; then setenv fk_kvers '5.19.10-armmp-lpae' fi . . .τότε στην επόμενη εκκίνηση θα πρέπει να έχει φορτωθεί ο καινούργιος πυρήνας. Μετά από ένα reboot και ξανά login ας το ελέγξουμε: then on the next boot the new kernel should be loaded. After a reboot and logging in again, let's check it:fk_kvers="6.3.1-armmp-lpae"
root@odroid-bullseye:~# uname -a
Linux odroid-bullseye 6.3.1-armmp-lpae #exynos5 SMP PREEMPT Mon May  8 15:27:00 UTC 2023 armv7l GNU/Linux
root@odroid-bullseye:~#
- Υπάρχει ένα τμήμα μέσα στο config.ini που ασχολείται με την ανάλυση της οθόνης. Αυτό ίσως χρειαστεί να το πειράξουμε για να θέσουμε την κατάλληλη ανάλυση και ρυθμό σάρωσης για την οθόνη που χρησιμοποιούμε. Ίσως μας χρειαστεί αν δουλέψουμε με το KlipperScreen. Ας το γνωρίσουμε:
There is a section inside config.ini that deals with the screen resolution. We might need to modify it to set the appropriate resolution and refresh rate for the monitor we are using. We may need it if we work with KlipperScreen. Let's get to know it:
Τα ';' στην αρχή κάθε γραμμής δηλώνουν πως αυτές οι γραμμές είναι σχόλια, δηλαδή αγνοούνται. Αν εμείς σβήσουμε τον χαρακτήρα αυτό από κάποια γραμμή με videoconfig="..." τότε υποχρεώνουμε το ODroid να χρησιμοποιήσει αυτή την ανάλυση. Στη δικιά μου περίπτωση η ενεργοποίηση του 1080p@60-edid διόρθωσε κάποια τρεμοπαιξίματα που είχα στην εικόνα της οθόνης μου. Μόνο μια από αυτές τις γραμμές μπορεί να είναι ενεργοποιημένη. The ';' at the beginning of each line indicate that these lines are comments, meaning they are ignored. If we remove this character from a line with videoconfig="...", then we force the ODroid to use that resolution. In my case, enabling 1080p@60-edid fixed some flickering I had in my screen image. Only one of these lines can be enabled.
; Video Resolution
; You can specifiy a desired resolution
; Please note: this only applies to framebuffer and may be overwritten from a Desktop that you have installed
; https://www.kernel.org/doc/Documentation/fb/modedb.txt
; examples:
; ODROID-VU forced resolution
; videoconfig="video=HDMI-A-1:1280x800@60"
; -----------------------------------------------
; ODROID-VU forced EDID
; videoconfig="drm.edid_firmware=edid/1280x800.bin"
; -----------------------------------------------
; 1920x1080 (1080P) with monitor provided EDID information. (1080p-edid)
; videoconfig="video=HDMI-A-1:1920x1080@60"
; -----------------------------------------------
.
.
.
- Γενικά μέσα στο config.ini υπάρχουν επιλογές όπως το όνομα που θα εμφανίζεται κατά την εκκίνηση, τη MAC Address που θέλουμε να έχει το ODroid στο δίκτυο και κάποιες άλλες επιλογές, μικρής για την ώρα αξίας. Όμως μια μικρή μελέτη του boot.scr και του config.ini μπορεί να σας οδηγήσει σε κάποιες επιλογές που ταιριάζουν στη δικιά σας περίπτωση. Generally inside config.ini there are options such as the name that will appear during boot, the MAC Address we want the ODroid to have on the network, and some other options of little value for now. However, a little study of boot.scr and config.ini can lead you to some options that suit your own case.
Τελικές Ρυθμίσεις του Λειτουργικού
Final Touches on the New Operating System

Μέσα σε αυτή τη διανομή υπάρχει ένα script που ονομάζεται setup-odroid. Αυτό φροντίζει για κάποιες λεπτομέρειες, όπως η αλλαγή του password του root, η δημιουργία νέων χρηστών, η αλλαγή του ονόματος του συστήματος στο δίκτυο, κλπ. Όταν το τρέξουμε θα μας εμφανίσει ένα μενού. Από αυτό δημιουργούμε ένα χρήστη με δυνατότητα superuser, αλλάζουμε το password του root μιας και δεν είναι καλή τακτική να έχουμε το αρχικό και αν θέλουμε αλλάζουμε και το όνομα του συστήματος, κάθε φορά ενεργοποιώντας την κατάλληλη επιλογή και ακολουθώντας τα βήματα που περιγράφονται στην οθόνη. Π.χ. εγω το όνομα που έδωσα στο δικό μου είναι 'ender5-plus' μιας και γι' αυτόν τον εκτυπωτή το προορίζω. Παρότι μας δίνεται η επιλογή, δεν εγκαθιστούμε κάποιο γραφικό περιβάλλον.
Inside this distribution there is a script called setup-odroid. It takes care of some details, such as changing the root password, creating new users, changing the system's hostname on the network, etc. When we run it, it will present us with a menu. From there we create a user with superuser privileges, change the root password since it is not good practice to keep the initial one, and if we want, change the system's hostname, each time activating the appropriate option and following the steps described on screen. For example, the name I gave mine is 'ender5-plus' since that is the printer I intend it for. Although we are given the option, we do not install a graphical environment.
Κατά την έξοδο από το script, το σύστημα μας ζητάει να κάνουμε επανεκκίνηση για να εφαρμοστούν όλες οι αλλαγες. Από την επόμενη φορά μπορούμε να κάνουμε login ως ο χρήστης που δημιουργήσαμε.
When exiting the script, the system asks us to reboot for all changes to take effect. From the next time, we can log in as the user we created.
Κάτι που παρατηρούμε εύκολα είναι πως δεν υπαρχει εγκαταστημένο το sudo, κάτι που διορθώνεται εύκολα. Κάνουμε login ως root όπως κάναμε μέχρι τώρα και δίνουμε τις εντολές:
Something we easily notice is that sudo is not installed, which is easily fixed. We log in as root as we have been doing and issue the commands:
root@ender5-plus:~# apt update
.
.
.
root@ender5-plus:~# apt-get install sudo
.
.
.
Setting up sudo (1.9.5p2-3+deb11u4) ...
invoke-rc.d: policy-rc.d denied execution of start.
Processing triggers for man-db (2.9.4-2) ...
root@ender5-plus:~#
Μετά από αυτό, ο χρήστης μας θα έχει τη δυνατότητα να χρησιμοποιεί το sudo για να κάνει δουλειές ως superuser.
After this, our user will have the ability to use sudo to do work as superuser.
Εγκατάσταση Klipper
Klipper Installation
Τώρα που το λειτουργικό μας είναι ενεργό και λειτουργεί κανονικά, ήρθε η ώρα να εγκαταστήσουμε το Klipper. Το Klipper είναι ένα ανοικτού λογισμικού λειτουργικό σύστημα για 3D εκτυπωτές. Παρέχει πολλά καλούδια και είναι αρκετά ικανό στην επέκταση αλλά και ρύθμιση παραμέτρων που έχουν να κάνουν με το φυσικό μας μηχάνημα, σε αντίθεση με το Marlin που για να αλλάξεις κάποιες παραμέτρους θα πρέπει να το ξανακάνεις compile και να το εγκαταστήσεις στον controller του εκτυπωτή. Στην περίπτωση του Marlin ο controller δεν χρειάζεται να είναι κάτι ιδιαίτερο, αλλά στην περίπτωση του Klipper πρέπει να υπάρχει ένας υπολογιστής που είναι ο εγκέφαλος του συστήματος. Στη δικιά μας περίπτωση αυτός ο εγκέφαλος είναι το ODroid. Δε θα προσπαθήσω να δείξω σε κάποιον πώς να αποφασίσει ποιο είναι καλύτερο για τη δικιά του περίπτωση. Γι' αυτό υπάρχουν άπειρες πληροφορίες μέσα στο διαδίκτυο.
Now that our operating system is active and working properly, it's time to install Klipper. Klipper is an open-source firmware for 3D printers. It provides many benefits and is quite capable of extension and configuration of parameters related to our physical machine, unlike Marlin where changing some parameters requires recompiling and reinstalling on the printer's controller. In the case of Marlin, the controller doesn't need to be anything special, but with Klipper there must be a computer that is the brain of the system. In our case, that brain is the ODroid. I won't try to show anyone how to decide which is better for their own situation—there is endless information about that on the internet.
Πίσω από το Klipper υπάρχει μια μεγάλη κοινότητα, η οποία μας κάνει τα πράγματα πιο απλά. Για την εγκατάσταση έχει δημιουργήσει το KIAUH (Klipper Installation and Updating Helper). Με τη βοήθειά του θα κάνουμε εγκατάσταση το σύστημα και κάποια πρόσθετά του, αλλά για να το χρησιμοποιήσουμε θα πρέπει να το εγκαταστήσουμε στο ODroid μας. Αφού κάνουμε login σαν απλός χρήστης κλωνοποιούμε το αποθετήριο του KIAUH.
Behind Klipper there is a large community that makes things easier for us. For installation, they have created KIAUH (Klipper Installation and Updating Helper). With its help we will install the system and some of its add-ons, but to use it we need to install it on our ODroid. After logging in as a regular user, we clone the KIAUH repository.
eliaschr@ender5-plus:~$ git clone https://github.com/dw-0/kiauh.git
Cloning into 'kiauh'...
.
.
.
Receiving objects: 100% (6247/6247), 2.61 MiB | 1.03 MiB/s, done.
Resolving deltas: 100% (4212/4212), done.
eliaschr@ender5-plus:~$
eliaschr@ender5-plus:~$ sudo apt install -y python3 python3-pip
.
.
.
eliaschr@ender5-plus:~$
Τώρα είμαστε σε θέση να εκτελέσουμε το KIAUH.
Now we can run KIAUH.
eliaschr@ender5-plus:~$ cd kiauh
eliaschr@ender5-plus:~/kiauh$ ./kiauh.sh
╔═══════════════════════════════════════════════════════╗
║ ~~~~~~~~~~~~~~~~~~~ [ Main Menu ] ~~~~~~~~~~~~~~~~~~~ ║
╟──────────────────┬────────────────────────────────────╢
║  0) [Log-Upload] │   Klipper: Not installed           ║
║                  │     Owner: -                       ║
║  1) [Install]    │      Repo: -                       ║
║  2) [Update]     ├────────────────────────────────────╢
║  3) [Remove]     │ Moonraker: Not installed           ║
║  4) [Advanced]   │     Owner: -                       ║
║  5) [Backup]     │      Repo: -                       ║
║                  ├────────────────────────────────────╢
║  S) [Settings]   │        Mainsail: Not installed     ║
║                  │          Fluidd: Not installed     ║
║ Community:       │   Client-Config: -                 ║
║  E) [Extensions] │                                    ║
║                  │   KlipperScreen: Not installed     ║
║                  │       Crowsnest: Not installed     ║
╟──────────────────┼────────────────────────────────────╢
║      v6.3.2      │  Changelog: https://git.io/JnmlX   ║
╟──────────────────┴────────────────────────────────────╢
║                        Q) Quit                        ║
╚═══════════════════════════════════════════════════════╝
###### Perform action: 1
Για να εγκαταστήσουμε το Klipper επιλέγουμε το 1) [Install], στη συνέχεια επιλέγουμε το 1) [Klipper], επιλέγουμε μόνο 1 instance και αν θέλουμε να μας δημιουργήσει ένα παράδειγμα printer.cfg. Εγώ επιλέγω το Y, παρότι όταν ρυθμίζουμε τον εκτυπωτή μας μπορούμε να χρησιμοποιήσουμε άλλο έτοιμο. Όταν προχωρήσει η εγκατάσταση θα μας ρωτήσει αν θέλουμε να βάλει το χρήστη μας στο group dialout. Η απάντηση θα είναι θετική, 'Y'. Αυτό ήταν. Το βασικό Klipper εγκαταστάθηκε!
To install Klipper we select 1) [Install], then we select 1) [Klipper], choose only 1 instance and if we want it to create an example printer.cfg. I choose Y, even though when configuring our printer we can use another ready-made one. When the installation proceeds it will ask if we want to add our user to the dialout group. The answer will be positive, 'Y'. That's it. The basic Klipper is installed!
Εγκατάσταση Moonraker
Moonraker Installation
Το moonraker είναι ένα σύστημα που δίνει πρόσβαση στο API του Klipper μεσω web. Δεν είναι το Web Interface αλλά ο ενδιάμεσος κρίκος από ένα web interface με το ίδιο το Klipper. Η εγκατάστασή του σε ένα 32-bit σύστημα έχει τα προβλήματά της, κυρίως λόγω μιας βιβλιοθήκης της python που δεν υποστηρίζει τέτοια παλιά συστήματα.
The moonraker is a system that provides access to the Klipper API via web. It is not the Web Interface but the intermediary link from a web interface to Klipper itself. Its installation on a 32-bit system has its problems, mainly due to a python library that does not support such old systems.
Ας προσπαθήσουμε να την κάνουμε εγκατάσταση από το KIAUH. Αρχικά στο κεντρικό μενού του KIAUH επιλέγουμε το 1) [Install] και στη συνέχεια το 2) [Moonraker]. Το σύστημα μας ρωτάει αν θέλουμε να κατασκευάσει ένα αρχείο moonraker.conf. Εδώ και πάλι η απάντησή μου είναι θετική, έτσι ώστε να έχω ένα αρχικό ξεκίνημα. Μετά από αυτό ξεκινάει η διαδικασία της εγκατάστασης.
Let's try to install it from KIAUH. First, in the main menu of KIAUH we select 1) [Install] and then 2) [Moonraker]. The system asks if we want it to create a moonraker.conf file. Here again my answer is positive, so that I have a starting point. After that, the installation process begins.
Κι ενώ όλα πάνε υπέροχα, ξαφνικά η εγκατάσταση σταματάει με σφάλμα κατά την εγκατάσταση του markupsafe. Προσπαθεί να εγκαταστήσει την έκδοση 3.0.3 η οποία δεν υποστηρίζει τα 32 bit συστήματα. Θα πρέπει να εγκαταστήσουμε την έκδοση 2.1.5 που υποστηρίζει τα συστήματα σαν το ODroid μας. Για να γίνει αυτό πρέπει να βγούμε από το περιβάλλον του KIAUH και να κάνουμε το υπόλοιπο της εγκατάστασης χειροκίνητα.
And while everything goes wonderfully, suddenly the installation stops with an error during the installation of markupsafe. It tries to install version 3.0.3 which does not support 32-bit systems. We need to install version 2.1.5 which supports systems like our ODroid. To do this, we need to exit the KIAUH environment and do the rest of the installation manually.
Μέχρι τώρα η εγκατάσταση που είχε ξεκινήσει, έχει φέρει τον κώδικα του moonraker από το αποθετήριο στον κατάλογο του χρήστη και έχει φτιάξει ένα εικονικό περιβάλλον της python γι' αυτό. Εμείς θα πρέπει να ενεργοποιήσουμε το περιβάλλον του moonraker, να εγκαταστήσουμε το κατάλληλο markupsafe και να συνεχίσουμε την εγκατάσταση. Στη συνέχεια θα ξαναμπούμε στο KIAUH για να του πούμε να ολοκληρωσει την εγκατάσταση μόνο του, αλλά με τα ήδη υπάρχοντα. Ας δούμε τη διαδικασία βήμα προς βήμα:
Up to now, the installation that had started has fetched the moonraker code from the repository to the user's directory and has created a python virtual environment for it. We will need to activate the moonraker environment, install the appropriate markupsafe, and continue the installation. Then we will re-enter KIAUH to tell it to complete the installation on its own, but with the already existing components. Let's see the process step by step:
Πρώτα πρέπει να ενεργοποιήσουμε το εικονικό περιβάλλον της python για το moonraker.
First we need to activate the python virtual environment for moonraker.
eliaschr@ender5-plus:~/kiauh$ cd ..
eliaschr@ender5-plus:~$ source moonraker-env/bin/activate
(moonraker-env) eliaschr@ender5-plus:~$ pip install markupsafe==2.1.5
.
.
.
Η τελευταία εντολή εγκαθιστά το markupsafe στη σωστή έκδοση που ταιριάζει στα 32 bit συστήματα. Στη συνέχεια θα πρέπει να συνεχίσουμε την εγκατάσταση, αλλά αυτό θα γίνει με το χέρι.
The last command installs markupsafe in the correct version that fits 32-bit systems. Next we need to continue the installation, but this will be done manually.
(moonraker-env) eliaschr@ender5-plus:~$ cd moonraker
(moonraker-env) eliaschr@ender5-plus:~/moonraker$ pip install -r scripts/moonraker-requirements.txt
Looking in links: /home/eliaschr/moonraker/scripts/python_wheels
Collecting tornado<=6.5.8,>=6.2.0
  Using cached tornado-6.5.8.tar.gz (520 kB)
.
.
.
Η εγκατάσταση ουσιαστικά έχει ολοκληρωθεί. Για τυχόν κομμάτια που θα έκανε το KIAUH καλό είναι να εκτελέσουμε άλλη μια φορά την εγκατάσταση από εκεί, αλλά πάμε να δούμε πως... Φυσικά, πριν την εκτέλεση του KIAUH θα πρέπει να βγούμε από το εικονικό περιβάλλον python του moonraker.
The installation has essentially been completed. For any parts that KIAUH would do, it is good to run the installation from there once more, but let's see how... Of course, before running KIAUH we need to exit the moonraker python virtual environment.
(moonraker-env) eliaschr@ender5-plus:~/moonraker$ deactivate
eliaschr@ender5-plus:~/moonraker$ cd ~/kiauh
eliaschr@ender5-plus:~/kiauh$ ./kiauh.sh
Επιλέγουμε το 1) [Install] και στη συνέχεια το 2) [Moonraker]. Ακολουθεί ένα στιγμιότυπο από τα μηνύματα του συστήματος και τις απαντήσεις που δίνουμε:
We select 1) [Install] and then 2) [Moonraker]. A screenshot of the system messages and the answers we give follows:
###### Create example moonraker.conf? (Y/n): Y

###### Cloning repository from 'https://github.com/Arksine/moonraker'
###### '/home/eliaschr/moonraker' already exists. Overwrite? (y/N): N
[INFO] Skip cloning of repository ...

###### Parsing Moonraker system dependencies  ...
[INFO] Parsing system dependencies from system-dependencies.json ...

###### Set up Python virtual environment ...
###### Virtualenv already exists. Re-create? (y/N): N
[INFO] Skipping re-creation of virtualenv ...

###### Installing Moonraker policykit rules ...
[sudo] password for eliaschr:
[INFO] Moonraker policykit rules are already installed.

###### Creating new Moonraker Instance ...
[OK] Service file created: /etc/systemd/system/moonraker.service
[OK] Env file created: /home/eliaschr/printer_data/systemd/moonraker.env

###### Enable moonraker.service ...
[OK] OK!

###### Creating example moonraker.conf in '/home/eliaschr/printer_data/config'
[INFO] '/home/eliaschr/printer_data/config/moonraker.conf' already exists.

###### Start moonraker.service ...
[OK] OK!
┏━━━━━━━━━━━━━━━━━━━━━━━━━━━━━━━━━━━━━━━━━━━━━━━━━━━━━━━┓
┃         [ Moonraker successfully installed! ]         ┃
┠───────────────────────────────────────────────────────┨
┃ You can access Moonraker via the following URL:       ┃
┃ ● moonraker: http://192.168.1.5:7125                  ┃
┗━━━━━━━━━━━━━━━━━━━━━━━━━━━━━━━━━━━━━━━━━━━━━━━━━━━━━━━┛
Και επίσημα, πλέον, η εγκατάσταση του Moonraker έχει ολοκληρωθεί! Αν θέλετε να τεστάρετε τη λειτουργία του, μπορείτε να επισκευτείτε με ένα browser τη σελίδα του, όπως φαίνεται και στην ακόλουθη εικόνα:
And now, officially, the installation of Moonraker has been completed! If you want to test its functionality, you can visit its page with a browser, as shown in the following image:

Εγκατάσταση Fluidd
Fluidd Installation
Επόμενο βήμα στη διεργασία μας είναι να εγκαταστήσουμε ένα Web περιβάλλον. Εδώ έχουμε τη δυνατότητα να εγκαταστήσουμε είτε το Mainsail είτε το Fluidd. Εγώ θα προχωρήσω με το Fluidd, αλλά δε νομίζω να υπάρχει κάποιο πρόβλημα στην εγκατάσταση του Mainsail. Είναι καθαράστη δικιά σας επιλογή.
Next step in our process is to install a Web environment. Here we have the ability to install either Mainsail or Fluidd. I will proceed with Fluidd, but I don't think there is any problem with installing Mainsail. It is entirely your own choice.
Όπως πάντα, αν είμαστε στην κεντρική οθόνη του KIAUH, επιλέγουμε το 1) [Install] Ενώ στην επόμενη οθόνη επιλέγουμε το περιβάλλον Web που θέλουμε. Εδώ εγώ θα επιλέξω το 4) [Fluidd]. Η συνέχεια της εγκατάστασης δεν περιλαμβάνει εκπλήξεις όπως πριν.
As always, if we are on the main screen of KIAUH, we select 1) [Install]. And on the next screen we select the Web environment we want. Here I will select 4) [Fluidd]. The rest of the installation does not include surprises like before.
###### Perform action: 4
┏━━━━━━━━━━━━━━━━━━━━━━━━━━━━━━━━━━━━━━━━━━━━━━━━━━━━━━━┓
┃                       [ INFO ]                        ┃
┠───────────────────────────────────────────────────────┨
┃ It is recommended to use special macros in order to   ┃
┃ have Fluidd fully functional and working.             ┃
┃                                                       ┃
┃ The recommended macros for Fluidd can be seen here:   ┃
┃ https://github.com/fluidd-core/fluidd-config          ┃
┃                                                       ┃
┃ If you already use these macros skip this step.       ┃
┃ Otherwise you should consider to answer with 'Y' to   ┃
┃ download the recommended macros.                      ┃
┗━━━━━━━━━━━━━━━━━━━━━━━━━━━━━━━━━━━━━━━━━━━━━━━━━━━━━━━┛
###### Download the recommended Fluidd-Config? (Y/n): Y
┏━━━━━━━━━━━━━━━━━━━━━━━━━━━━━━━━━━━━━━━━━━━━━━━━━━━━━━━┓
┃ Please select the port, Fluidd should be served on.   ┃
┃ If your are unsure what to select, hit Enter to apply ┃
┃ the suggested value of: 80                            ┃
┃                                                       ┃
┃ In case you need Fluidd to be served on a specific    ┃
┃ port, you can set it now. Make sure that the port is  ┃
┃ not already used by another application on your       ┃
┃ system!                                               ┃
┗━━━━━━━━━━━━━━━━━━━━━━━━━━━━━━━━━━━━━━━━━━━━━━━━━━━━━━━┛
###### Configure Fluidd for port (default=80):

###### Installing dependencies ...
.
.
.
###### Restart nginx ...
[OK] OK!
┏━━━━━━━━━━━━━━━━━━━━━━━━━━━━━━━━━━━━━━━━━━━━━━━━━━━━━━━┓
┃           [ Fluidd installation complete! ]           ┃
┠───────────────────────────────────────────────────────┨
┃        Open Fluidd now on: http://192.168.1.5         ┃
┗━━━━━━━━━━━━━━━━━━━━━━━━━━━━━━━━━━━━━━━━━━━━━━━━━━━━━━━┛
Αν θέλουμε να ελέγξουμε την εγκατάσταση τότε απλά επισκεπτόμαστε την ιστοσελίδα του ODroid με ένα browser και βλέπουμε το ακόλουθο:
If we want to check the installation then we simply visit the ODroid's website with a browser and see the following:

Φυσικά, το σφάλμα που δίνει το Klippy είναι λογικό, μιας και δεν υπάρχει συνδεδεμένος άλλος controller εκτυπωτή στο ODroid. Μπορείτε να το αγνοήσετε, αυτό θα φτιαχτεί όταν ρυθμίσετε το ODroid σας να λειτουργήσει με τον υπόλοιπο 3D εκτυπωτή σας.
Of course, the error given by Klippy is logical, since there is no other printer controller connected to the ODroid. You can ignore it; it will be fixed when you configure your ODroid to work with the rest of your 3D printer.
Εγκατάσταση KlipperScreen
KlipperScreen Installation
Το KlipperScreen είναι ένα module που μας δίνει τη δυνατότητα να χρησιμοποιήσουμε μια οθόνη HDMI και κάποιο συμβατό touchscreen για να κάνουμε χειρισμό του εκτυπωτή μας τοπικά και όχι μέσω δικτύου. Μπορεί να λειτουργήσει είτε ως ένα περιβάλλον X11 ή Wayland, ή ακόμα και σαν απλή εφαρμογή που τρέχει μέσα σε ένα ήδη υπάρχον γραφικό περιβάλλον. Στην περίπτωση του ODroid θα λειτουργήσει ως περιβάλλον X11.
KlipperScreen is a module that gives us the ability to use an HDMI display and a compatible touchscreen to control our printer locally rather than over the network. It can run either as an X11 or Wayland environment, or even as a simple application inside an existing graphical environment. In the case of the ODroid, it will run as an X11 environment.
Για την εγκατάστασή του θα χρησιμοποιήσουμε πάλι το KIAUH, αλλά κι εδώ θα αντιμετωπίσουμε πρόβλημα, όπως έγινε και με το Moonraker. Θα το διαχειριστούμε, όμως, με άλλη προσέγγιση μιας και το KlipperScreen μηδενίζει το εικονικό του περιβάλλον κι έτσι η προσέγγιση που χρησιμοποιήσαμε στο moonraker δεν είναι η σωστή.
For its installation we will again use KIAUH, but here too we will face a problem, as happened with Moonraker. We will manage it, however, with a different approach since KlipperScreen resets its virtual environment, so the approach we used for moonraker is not the right one.
Ας ξεκινήσουμε την εγκατάσταση του KlipperScreen. Αρχικά τρέχουμε το KIAUH (αν δεν είμαστε ήδη εκεί) και επιλέγουμε το 1) [Install]. Στην επόμενη οθόνη επιλέγουμε το 7) [KlipperScreen]. Το σύστημα ξεκινάει με το κατέβασμα του KlipperScreen από το αποθετήριο. Στη συνέχεια μας ρωτάει για το αν θέλουμε να είναι γραφικό περιβάλλον από μόνο του ή να τρέχει ως εφαρμογή. Επιλέγουμε τη standalone προσέγγιση με 'Y'. Στη συνέχεια μας ρωτάει αν θέλουμε να λειτουργήσει με X11 ή με Wayland. Εδώ προτείνω το X11, οπότε απαντάμε με 'X'. Μας ρωτάει και το password του χρήστη μας για να μπορέσει να κάνει την εγκατάσταση των πακέτων του συστήματος. Και μετά από αυτό παρακολουθούμε την εγκατάσταση μέχρι να ολοκληρωθεί. Όμως η αγκατάσταση θα παρουσιάσει κάοπιο σφάλμα και παρότι θα συνεχίσει δε θα είναι λειτουργική.
Let's start the installation of KlipperScreen. First we run KIAUH (if we are not already there) and select 1) [Install]. On the next screen we select 7) [KlipperScreen]. The system begins by downloading KlipperScreen from the repository. Then it asks whether we want it to be a standalone graphical environment or to run as an application. We choose the standalone approach with 'Y'. Then it asks whether we want it to run with X11 or Wayland. Here I recommend X11, so we answer with 'X'. It also asks for our user password to be able to install system packages. After that, we watch the installation until it completes. However, the installation will show some error and although it will continue, it will not be functional.
###### Perform action: 7
###### Installing KlipperScreen ...

###### Cloning repository from 'https://github.com/KlipperScreen/KlipperScreen.git'
.
.
.
Checking Python version > 3,8
Python 3.9.2
Install standalone?
It will create a service, enable boot to console and install the graphical dependencies.

Say no to install as a regular desktop app that will not start automatically

Press enter for default (Yes)
[Y/n]Υ

Choose graphical backend

Wayland requires working KMS/DRM drivers

Press enter to install X11/Xserver
Backend X11 or Wayland (cage)? [X/w]X
Installing Xserver
[sudo] password for eliaschr:
.
.
.
Για να μπορέσουμε να διορθώσουμε το πρόβλημα θα πρέπει να μπούμε στον κατάλογο του KlipperScreen και να δηλώσουμε στα requirements πως θέλουμε το markupsafe 2.1.5. Έτσι, αφού βγούμε από το KIAUH εκτελούμε τις εντολές:
To fix the problem, we need to enter the KlipperScreen directory and specify in the requirements that we want markupsafe 2.1.5. So, after exiting KIAUH, we run the commands:
eliaschr@ender5-plus:~/kiauh$ cd ~/KlipperScreen/scripts/
eliaschr@ender5-plus:~/KlipperScreen/scripts$ vi KlipperScreen-requirements.txt
Φυσικά αντί για το vi μπορείτε να χρησιμοποιήσετε το nano ή όποιο άλλο πρόγραμμα επιθυμείτε για να προσθέσετε στο τέλος του αρχείου KlipperScreen-requirements.txt τη γραμμή:
Of course, instead of vi you can use nano or any other program you prefer to add to the end of the KlipperScreen-requirements.txt file the line:
markupsafe==2.1.5
Αποθηκεύετε το αρχείο, σβήνετε το εικονικό περιβάλλον της python για το KlipperScreen και ξεκινάτε και πάλι το KIAUH.
Save the file, deactivate the virtual python environment of KlipperScreen and execute KIAUH again.
eliaschr@ender5-plus:~/KlipperScreen/scripts$ cd
eliaschr@ender5-plus:~$ rm -rf .KlipperScreen-env/
eliaschr@ender5-plus:~$ cd kiauh
eliaschr@ender5-plus:~/kiauh$ ./kiauh.sh
Εκεί θα ξεκινήσετε για άλλη μια φορά την εγκατάσταση του KlipperScreen, όπως και πριν. Εδώ θα υπάρξει μια μικρή αλλαγή. Το σύστημα θα μας ρωτήσει αν θέλουμε να ξανακατεβάσει το KlipperScreen από το αποθετήριό του. Εμείς εδώ θα το αρνηθούμε για να μην αλλάξει το requirement που έχουμε θέσει:
There you will start the KlipperScreen installation once again, as before. There will be a small change here. The system will ask us if we want to re-download KlipperScreen from its repository. We will refuse here, so that the requirement we have set does not change:
###### Perform action: 7

###### Installing KlipperScreen ...

###### Cloning repository from 'https://github.com/KlipperScreen/KlipperScreen.git'
###### '/home/eliaschr/KlipperScreen' already exists. Overwrite? (y/N): N
[INFO] Skip cloning of repository ...
Checking Python version > 3,8
.
.
.
Τώρα το KlipperScreen θα εγκατασταθεί κανονικά. Αυτό που θα παρατηρήσετε είναι πως η υπηρεσία δεν εκκινεί σωστά και αν ψάξουμε λίγο το λόγο θα δούμε πως δε βρίσκει ένα εκτελέσιμο αρχείο, το chvt. Αυτό είναι ένα εκτελέσιμο που βοηθάει στην αλλαγή τερματικού (change virtual terminal). Βρίσκεται στο πακέτο kbd, το οποίο δεν έχει εγκατασταθεί στο σύστημά μας. Ώρα να το προσθέσουμε κι αυτό (θα μπορούσαμε, βέβαια, να το κάναμε νωρίτερα, πριν ξεκινήσουμε την εγκατάσταση του KlipperScreen).
Now KlipperScreen will be installed normally. What you will notice is that the service does not start correctly and if we look a little into the reason we will see that it cannot find an executable file, chvt. This is an executable that helps with changing virtual terminal (change virtual terminal). It is found in the kbd package, which has not been installed on our system. Time to add it as well (we could, of course, have done it earlier, before starting the installation of KlipperScreen).
eliaschr@ender5-plus:~/kiauh$ sudo apt update
.
.
.
eliaschr@ender5-plus:~/kiauh$ sudo apt install kbd
.
.
.
eliaschr@ender5-plus:~/kiauh$
Μόλις ολοκληρωθεί η εγκατάσταση θα δούμε στην οθόνη που είναι συνδεδεμένη στο HDMI του ODroid να εμφανίζεται η κλασική οθόνη του Klipper. Η εγκατάσταση του KlipperScreen ολοκληρώθηκε!.
As soon as the installation is completed, we will see the classic Klipper screen appear on the display connected to the ODroid's HDMI. The installation of KlipperScreen is completed!

Εγκατάσταση Crowsnest
Crowsnest Installation
Το τελευταίο κομμάτι που θα εγκαταστήσουμε είναι το Crowsnest. Αυτό είναι ένα module που μας χρειάζεται αν εγκαταστήσουμε κάμερα στον εκτυπωτή μας. Η εγκατάστασή του δεν επιφυλάσσει εκπλήξεις και γίνεται χωρίς κανένα πρόβλημα.
The last part we will install is Crowsnest. This is a module we need if we install a camera on our printer. Its installation holds no surprises and is done without any problem.
Από την κεντρική οθόνη του KIAUH επιλέγουμε το 1) [Install] και στη συνέχεια το 8) [Crowsnest]. Η εγκατάσταση ξεκινάει κανονικά. Σε κάποιο σημείο μας ρωτάει το password του χρήστη μας και το αν θέλουμε να προσθέσει τον update manager στο moonraker.conf. Στο τέλος μας ζητάει να κάνει επανεκκίνηση το σύστημα. Η εγκατάσταση ολοκληρώθηκε χωρίς κανένα πρόβλημα.
From the main screen of KIAUH we select 1) [Install] and then 8) [Crowsnest]. The installation starts normally. At some point it asks for our user password and whether we want it to add the update manager to moonraker.conf. At the end it asks the system to reboot. The installation was completed without any problem.
###### Perform action: 8

###### Cloning repository from 'https://github.com/mainsail-crew/crowsnest.git'
Cloning into '/home/eliaschr/crowsnest'...
remote: Enumerating objects: 1302, done.
.
.
.
###### Launching crowsnest installer ...
[INFO] Installer will prompt you for sudo password!
[sudo] password for eliaschr:
crowsnest - A webcam daemon for multiple cams and stream services.
.
.
.
Do you want to add 'update manager' entry to your moonraker.conf? [Y/n]: Y
Trying to add 'update manager' entry to moonraker.conf ...
.
.
.
Installation successful.

        Reboot your machine for the changes to take effect!

Reboot NOW? [y/N]: Y
Συμπεράσματα
Conslusion
Το ODroid U2 είναι ένας πολύ παλιός υπολογιστής μιας πλακέτας των 32 bit. Στα νιάτα του υπήρξε ένα αξιοπρόσεκτο μηχάνημα, αλλά σήμερα που η ισχύς των 64 bit είναι υπαρκτή και στα σημερινά μηχανήματα θα έλεγε κάποιος πως μπαίνει στο συρτάρι των αναμνήσεων για πάντα. Η 3D εκτύπωση FDM είναι κάτι που στην πραγματικότητα δεν έχει ανάγκη την ισχύ των 64 bit επεξεργασιάς. Συνεπώς, είναι μια καλή ευκαιρία να επαναφέρουμε στη ζωή ένα τέτοιο μηχάνημα. Είναι κρίμα, αλλά από την άλλη λογικό, που έχει σταματήσει η ανάπτυξη κώδικα για αυτή την κατηγορία υπολογιστών, αλλά οι κοινότητες πάντα βρίσκουν τρόπο να τα επαναφέρουν.
The ODroid U2 is a very old 32-bit single-board computer. In its youth it was a remarkable machine, but today, when 64-bit power is present in modern machines, one might say it goes into the drawer of memories forever. FDM 3D printing is something that does not really need 64-bit processing power. Therefore, it is a good opportunity to bring such a machine back to life. It is a pity, but on the other hand logical, that code development for this category of computers has stopped, but communities always find a way to bring them back.
Το Klipper είναι μια πολύ καλή ιδέα για να ζωντανέψει ένα παλιό 32 bit μηχάνημα. Η προσπάθεια που έχει γίνει σε αυτό το άρθρο πετυχαίνει ακριβώς αυτό! Το klipper ανασταίνει το ODroid με όλα τα καλούδια του, όπως γραφική οθόνη, touchscreen, απομακρυσμένο έλεγχο μέσω δικτύου και πληθώρα από extensions που υπάρχουν. Και, φυσικά, μην ξεχνάμε όλη τη διαχείριση της 3D εκτυπωσης που γίνεται με το μοναδικό του τρόπο!
Klipper is a very good idea to revive an old 32-bit machine. The effort made in this article achieves exactly that! Klipper resurrects the ODroid with all its goodies, such as graphical display, touchscreen, remote control via network, and a plethora of extensions. And, of course, let's not forget all the 3D printing management that is done in its unique way!
Αυτή η ανάρτηση ελπίζω να δώσει πνοή, όχι μόνο σε παλιούς υπολογιστές μιας πλακέτας, αλλά και σε projects που, σε κάποια περίπτωση θα μας ήταν ακριβά να ολοκληρώσουμε με σημερινά συστήματα 64 bit. Εξάλλου, το να δημιουργούνται ηλεκτρονικά σκουπίδια δεν είναι και ό,τι καλύτερο, ειδικά τη στιγμή που θα μπορούσαν να φανούν χρήσιμα.
This post I hope gives breath not only to old single-board computers, but also to projects that, in some cases, would be expensive to complete with today's 64-bit systems. After all, creating electronic waste is not the best thing, especially when they could be useful.